Quick Start Guide
1. Electronic Piano Assembly
Please watch the following video to assemble the electronic piano.
By watching this video, you can use it quickly:
The video contains the assembly steps of the electronic piano, the code burning method, the description of the web page control connection, and the function demonstration.
For more detailed instructions, please continue to read the following graphic tutorial.
Wiring
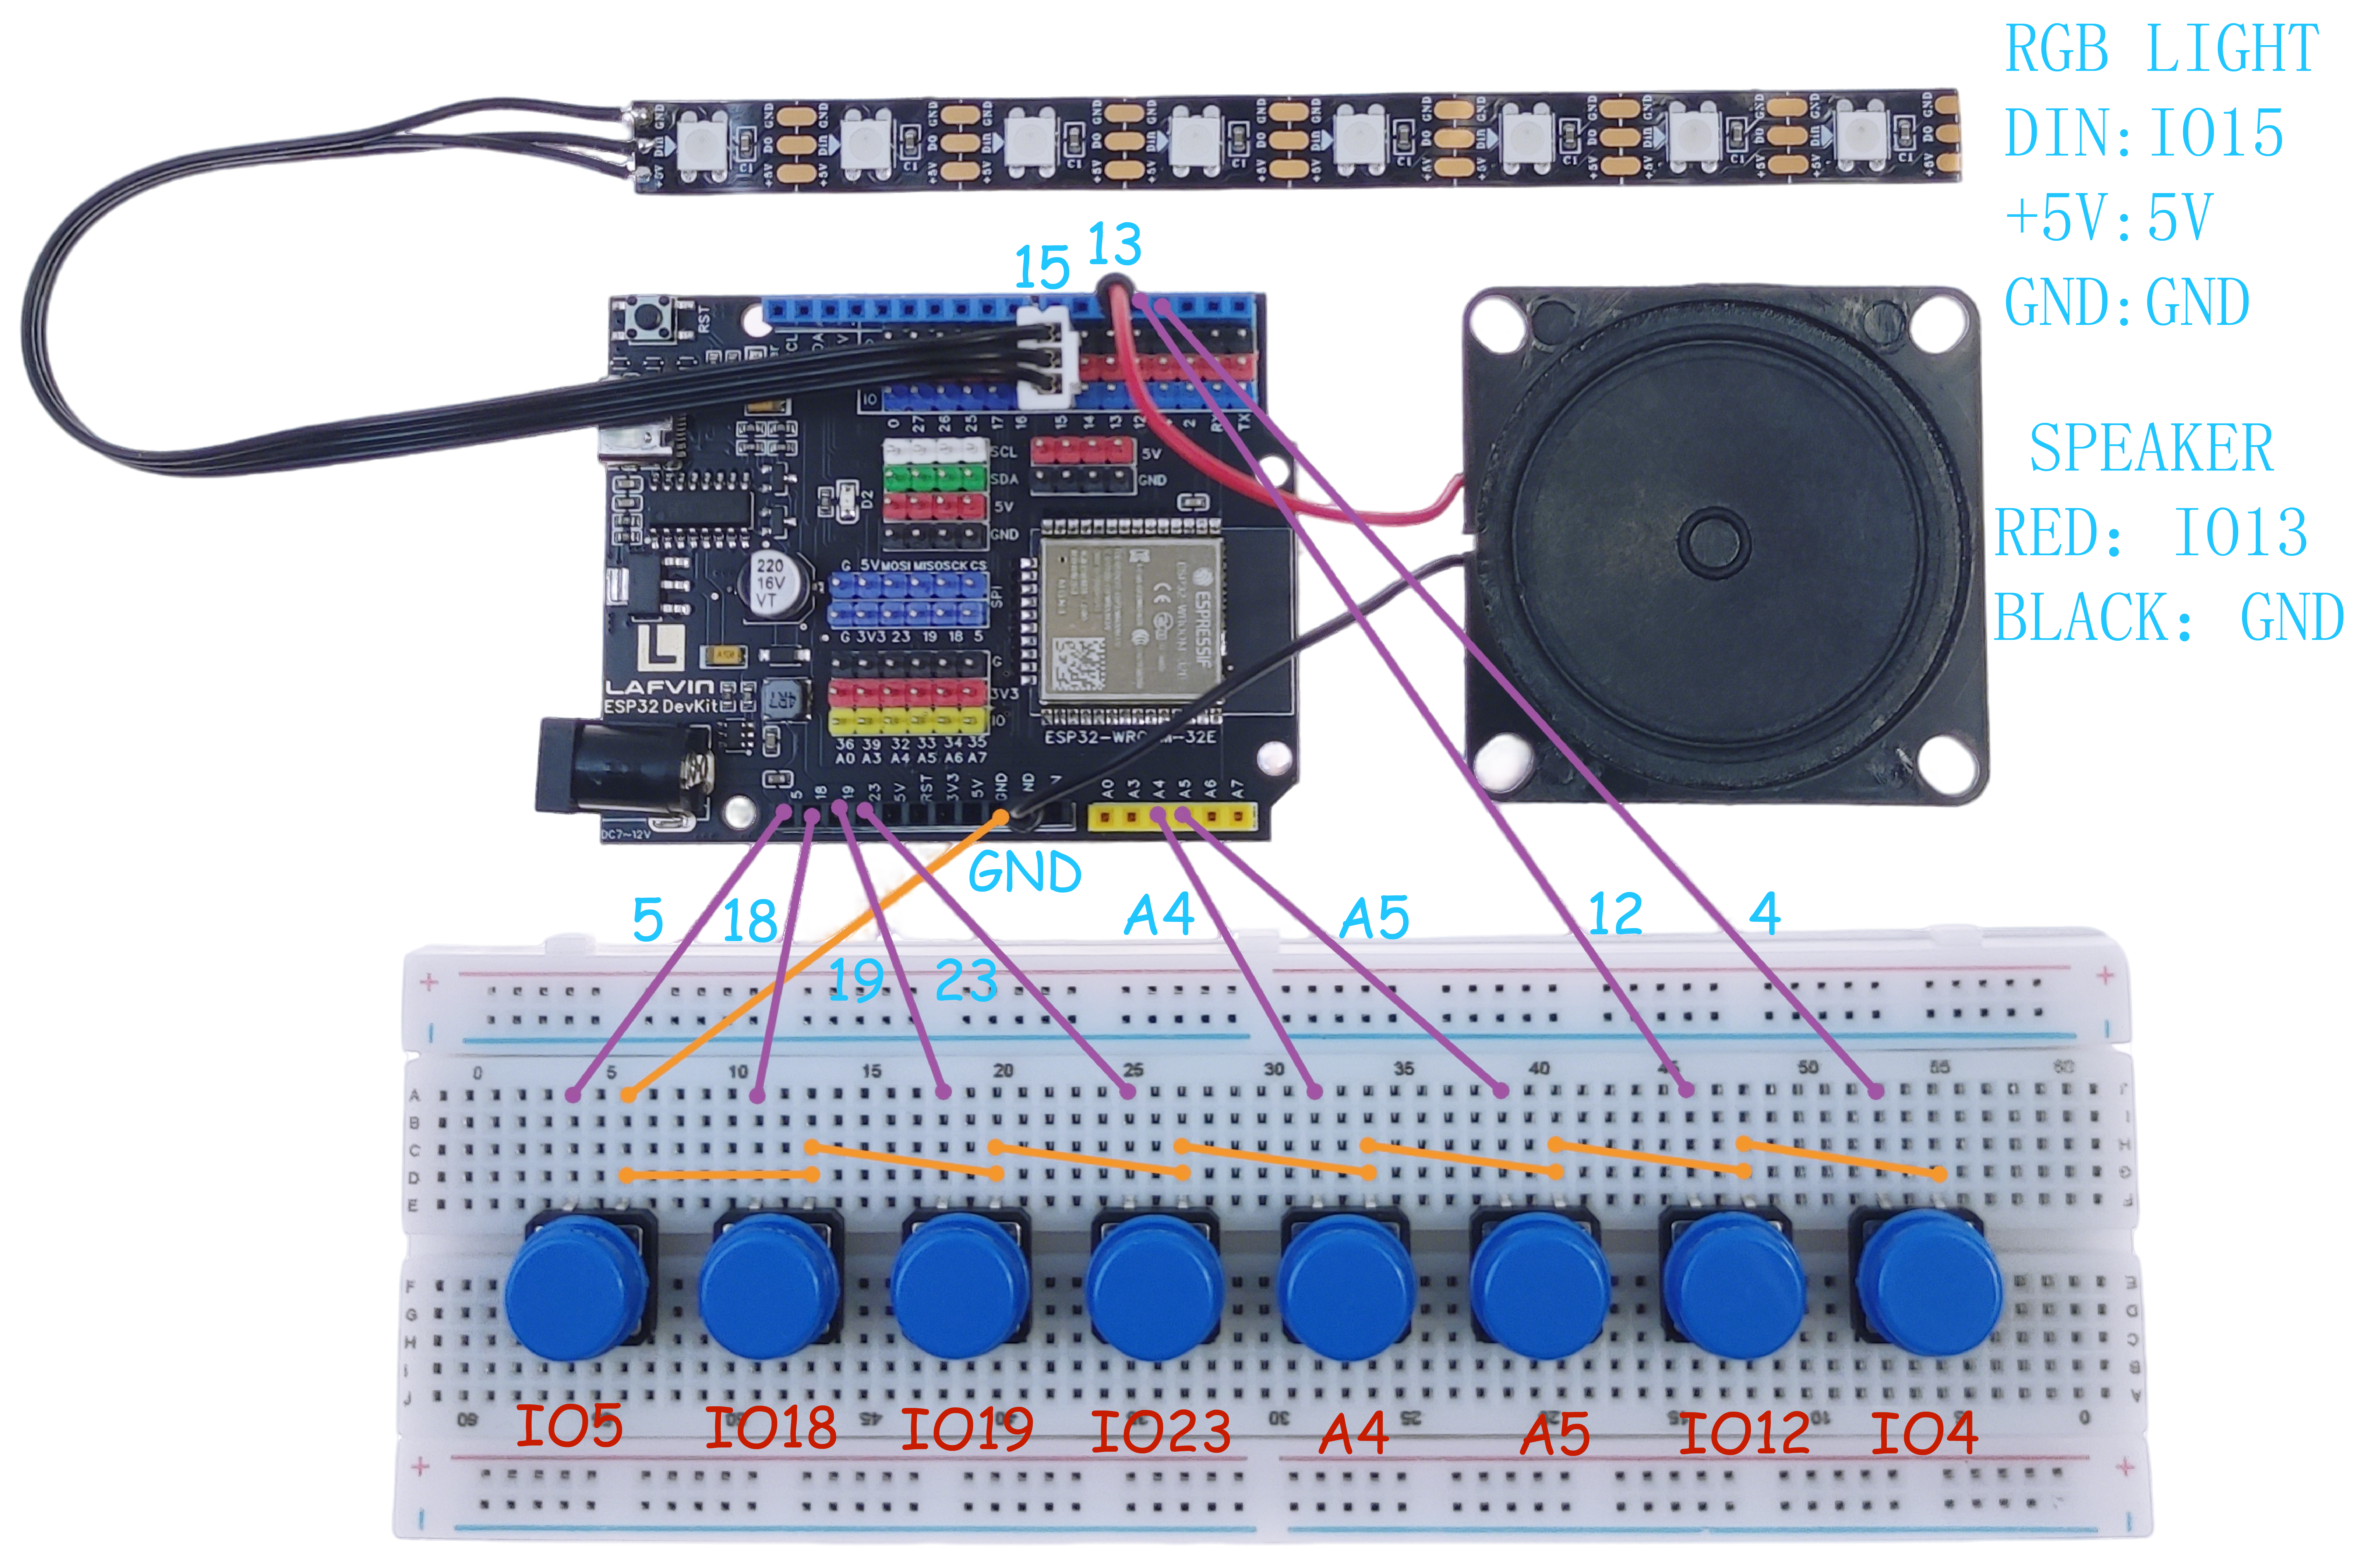
RGB —— ESP32 IO15
Button1 —— ESP32 IO5
Button2 —— ESP32 IO18
Button3 —— ESP32 IO19
Button4 —— ESP32 IO23
Button5 —— ESP32 IO32(A4)
Button6 —— ESP32 IO33(A5)
Button7 —— ESP32 IO12
Button8 —— ESP32 IO4
Speaker: Red line —— ESP32 IO13,Black line —— ESP32 GND
Note
One end of each of the eight buttons is connected in series and then connected to the GND pin of the ESP32.
Connect the RGB LED strip’s data input line(DIN)to the GPIO15 pin of the ESP32. When connecting, ensure that the end of the LED strip connector with the raised marking faces away from the Type-C interface on the development board.
2. Install Serial Port Tool
This kit uses an ESP32 development board with a CH340 serial port chip. The corresponding driver needs to be installed before connecting it to the computer for the first time. If you have already installed the CH340 driver, you can skip this step and proceed directly to the next section.
In the resource folder provided by this package, locate the “CH340 driver installation package” and follow the instructions in the image below to complete the installation.
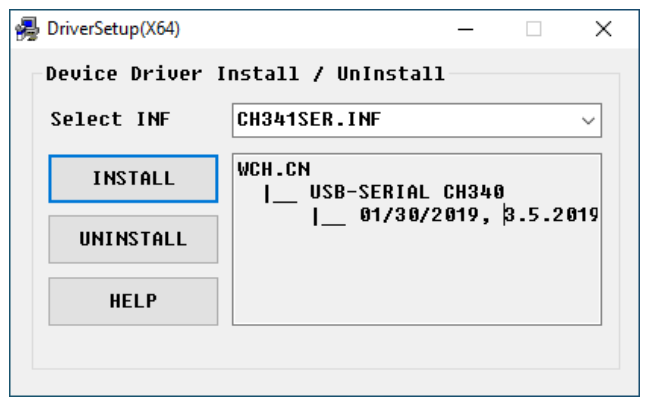
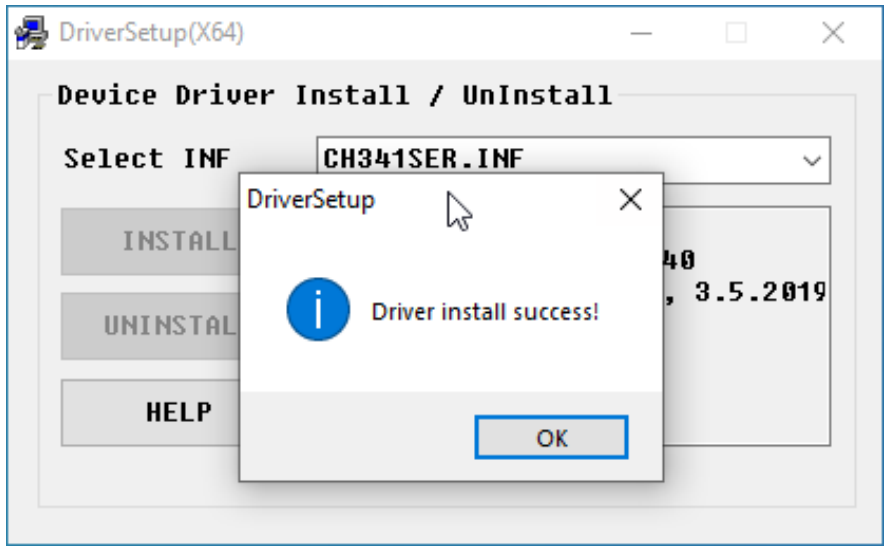
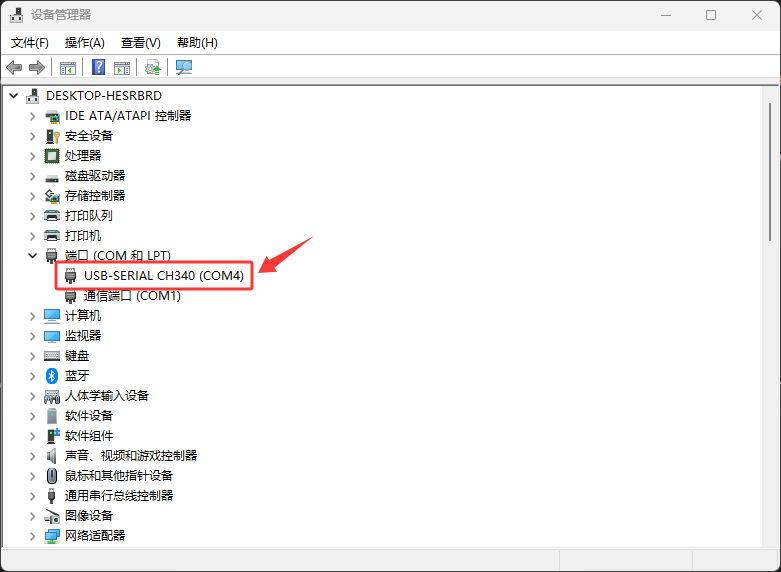
After installation, please connect the ESP32 development board to your computer using a Type-C data cable and check in Device Manager whether the serial port is successfully recognized(as shown in the image below). If it is not recognized, please try changing the USB port or reinstalling the driver.
3. Install Flash Download Tool
Please locate and open the “Flash Download Tool” installation package from the resource files we provided, and then follow the image instructions below to complete the installation.
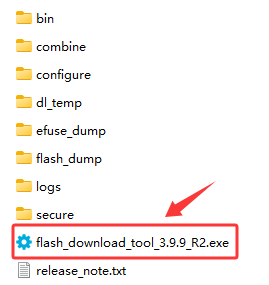
Unzip “Flash Download Tool”. The folder contains the following files. Double-click to open the program “flash_download_tool_XXXX”.
4. Burn The Program To ESP32
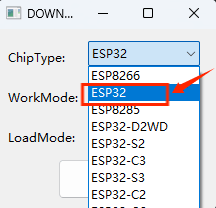
4.1 Please double-click to run the “flash_download_tool” program. After starting, you will see the software interface as shown in the image below. In the “Chip Type” selection box on the interface, please find and select “ESP32”.
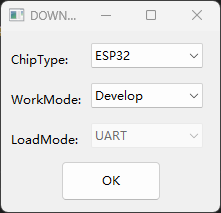
4.2 Please carefully check that all parameters are configured correctly according to the image before clicking “OK” to confirm. The system will then redirect to the programming interface.
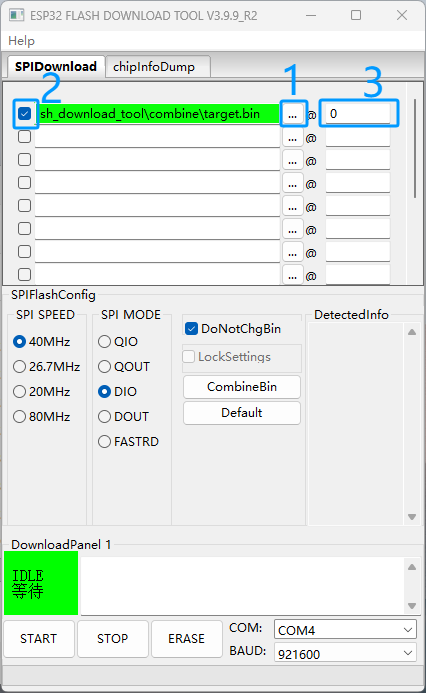
4.3 Import the firmware following the steps shown in the image.
Note
The firmware can be downloaded from the resources we provide;
The storage path is: Code & Library — Code — 6.ESP32_DIY_Electronic_Piano — 6.ESP32_DIY_Electronic_Piano.bin
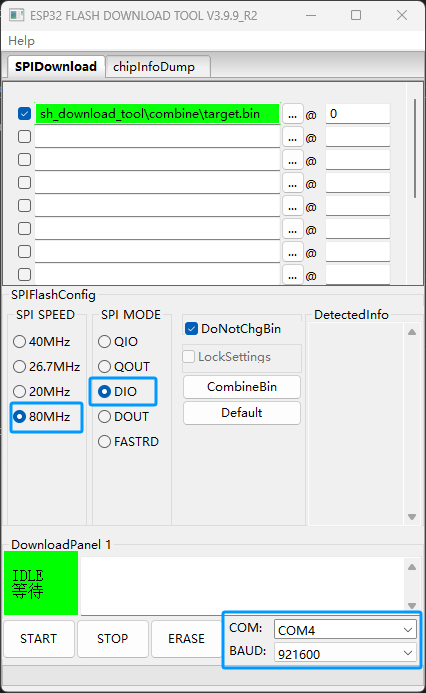
4.4 Set the parameters as shown in the picture: SPI SPEED select 80MHz, SPI MODE select DIO, COM select the serial port actually connected to the computer, and BAUD set to 921600.
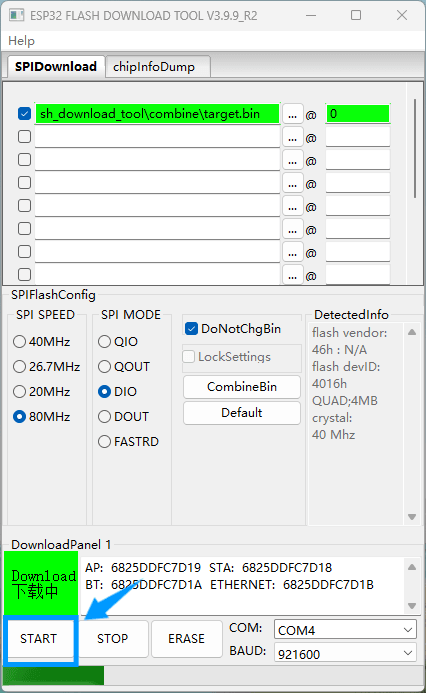
4.5 After completing the above settings, click the START button and the system will automatically start burning the firmware. Please wait patiently for the burning to complete.
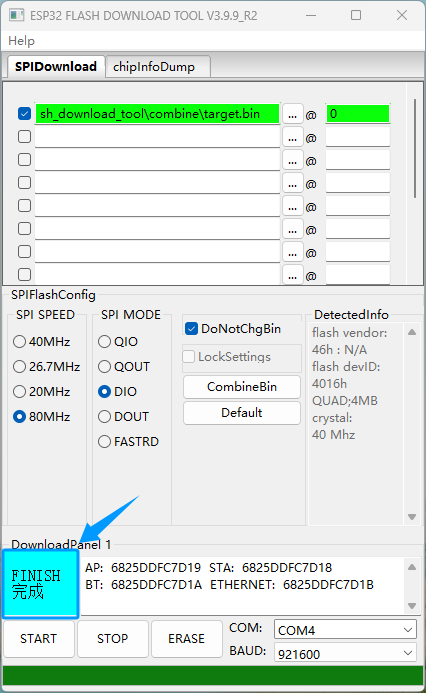
4.6 After the burning is completed, the interface will display the FINISH prompt. At this time, press the RST reset button on the ESP32 development board and the system will start running.
Note
If the flashing process fails, please follow these steps:
Confirm that the ESP32 development board is properly connected to the computer via a USB cable and that the CH340 driver is installed.
Check that COMx in the flashing tool is the actual serial port number.
Confirm that the firmware file is correctly placed in the BIN folder and check the box on the left.
Verify the flashing parameter settings: SPI SPEED = 80MHz, SPI MODE = DIO, BAUD = 921600.
Try changing the USB cable or USB port to eliminate communication issues.
If flashing still fails, restart the computer and development board and try again.
5. Electronic Piano User Guide
B:RGB Lighting Effects
Manual Mode: When a button is pressed, the corresponding LED lights up, while adjacent LEDs remain at low brightness.
Auto Playback Mode: Displays different lighting effects depending on the currently playing song.
C:WiFi Web Control
Turn on your phone’s Wi-Fi, find the hotspot named ESP32_Piano and connect to it. The password is 12345678.
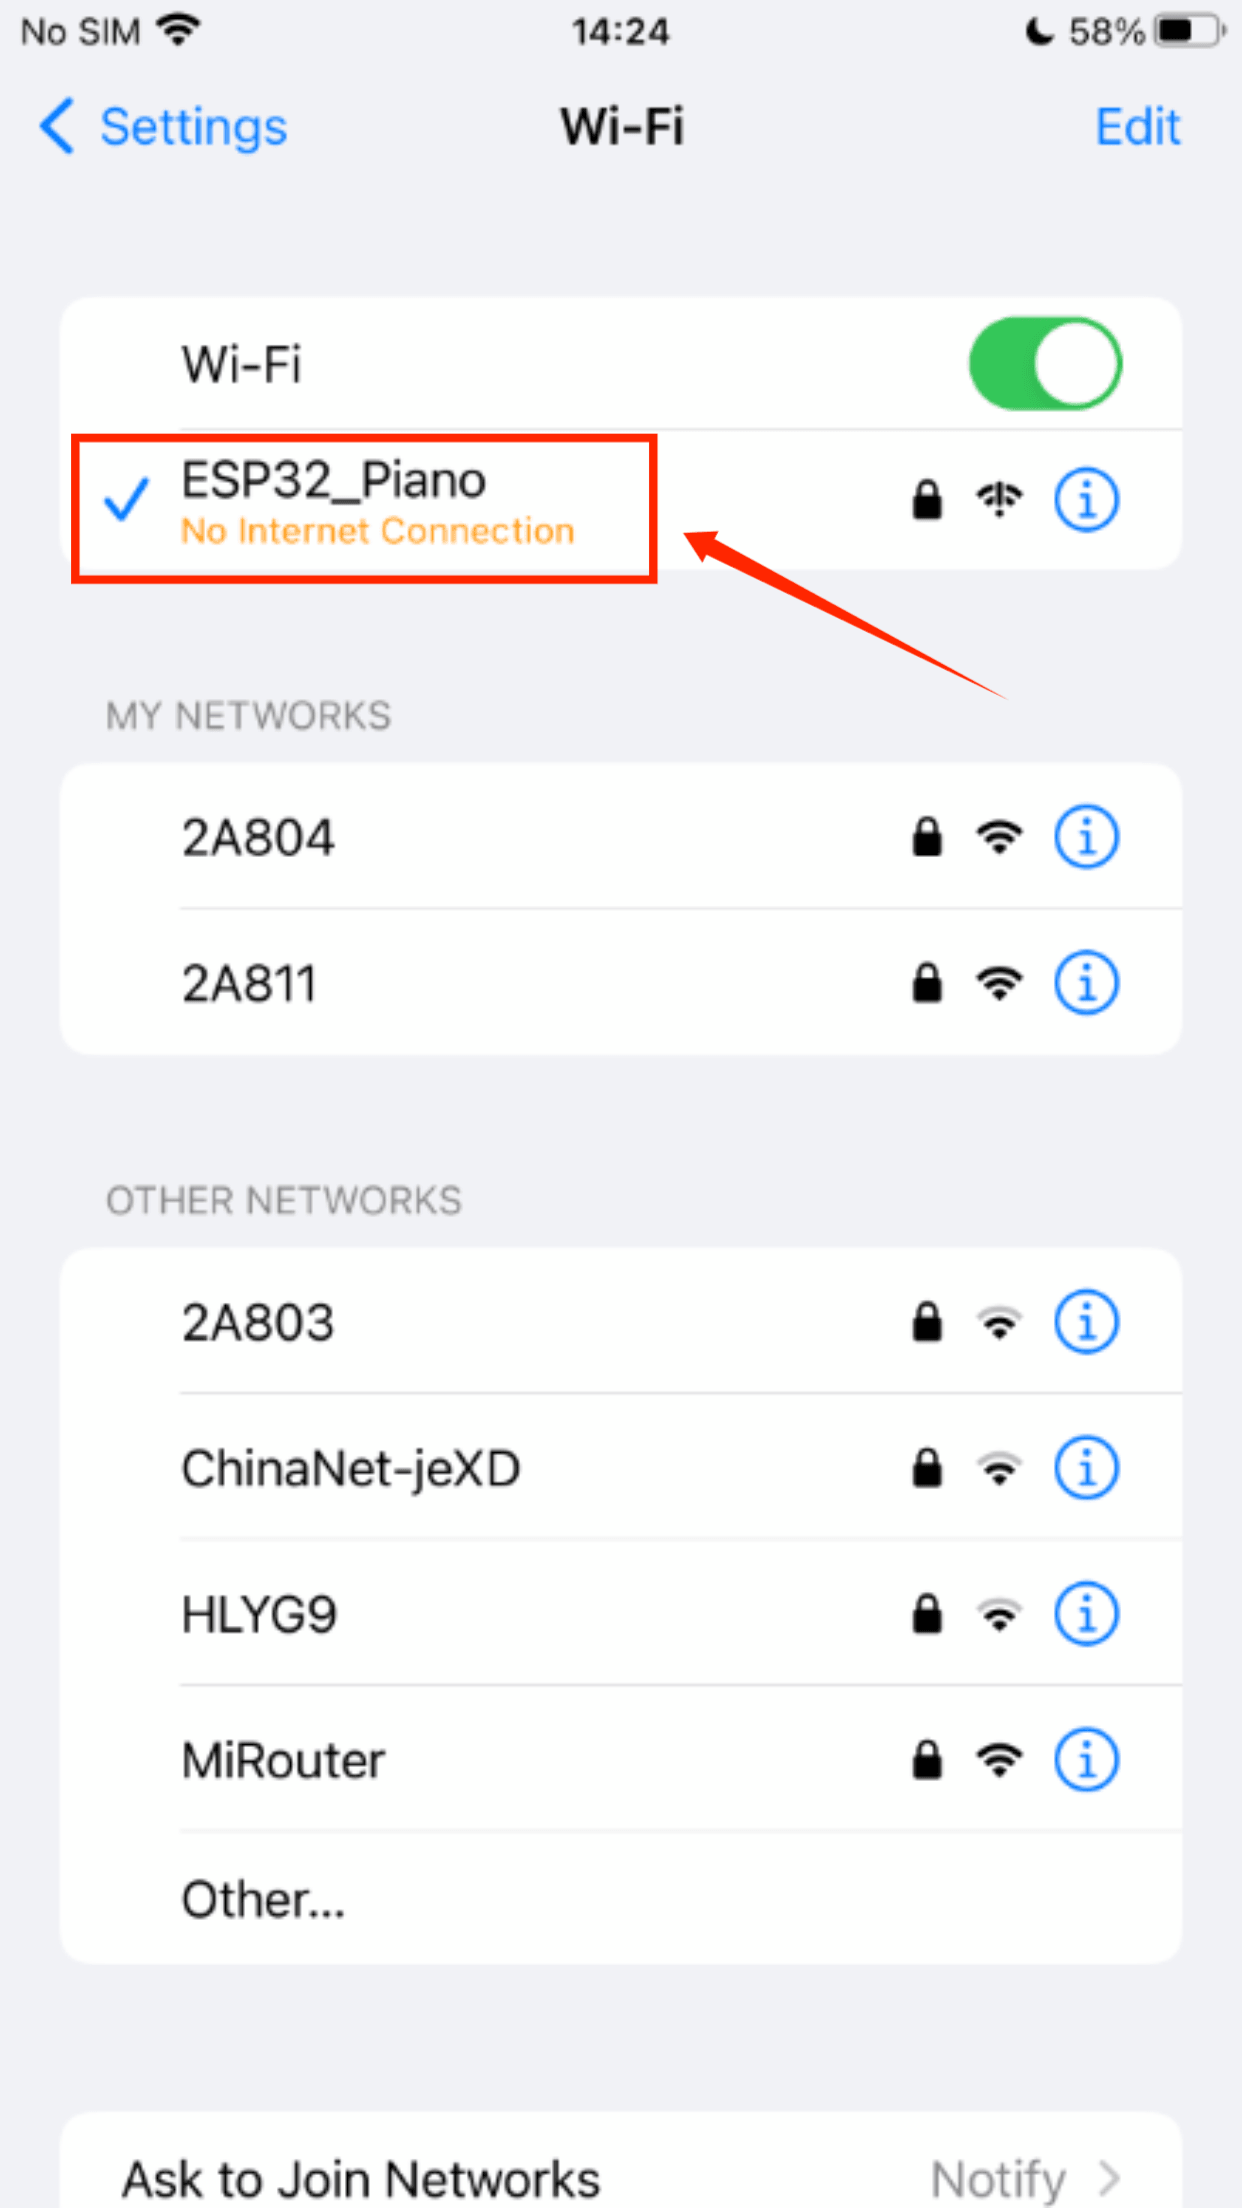
After a successful connection, open any browser and enter 192.168.4.1 in the address bar to access the web control interface.
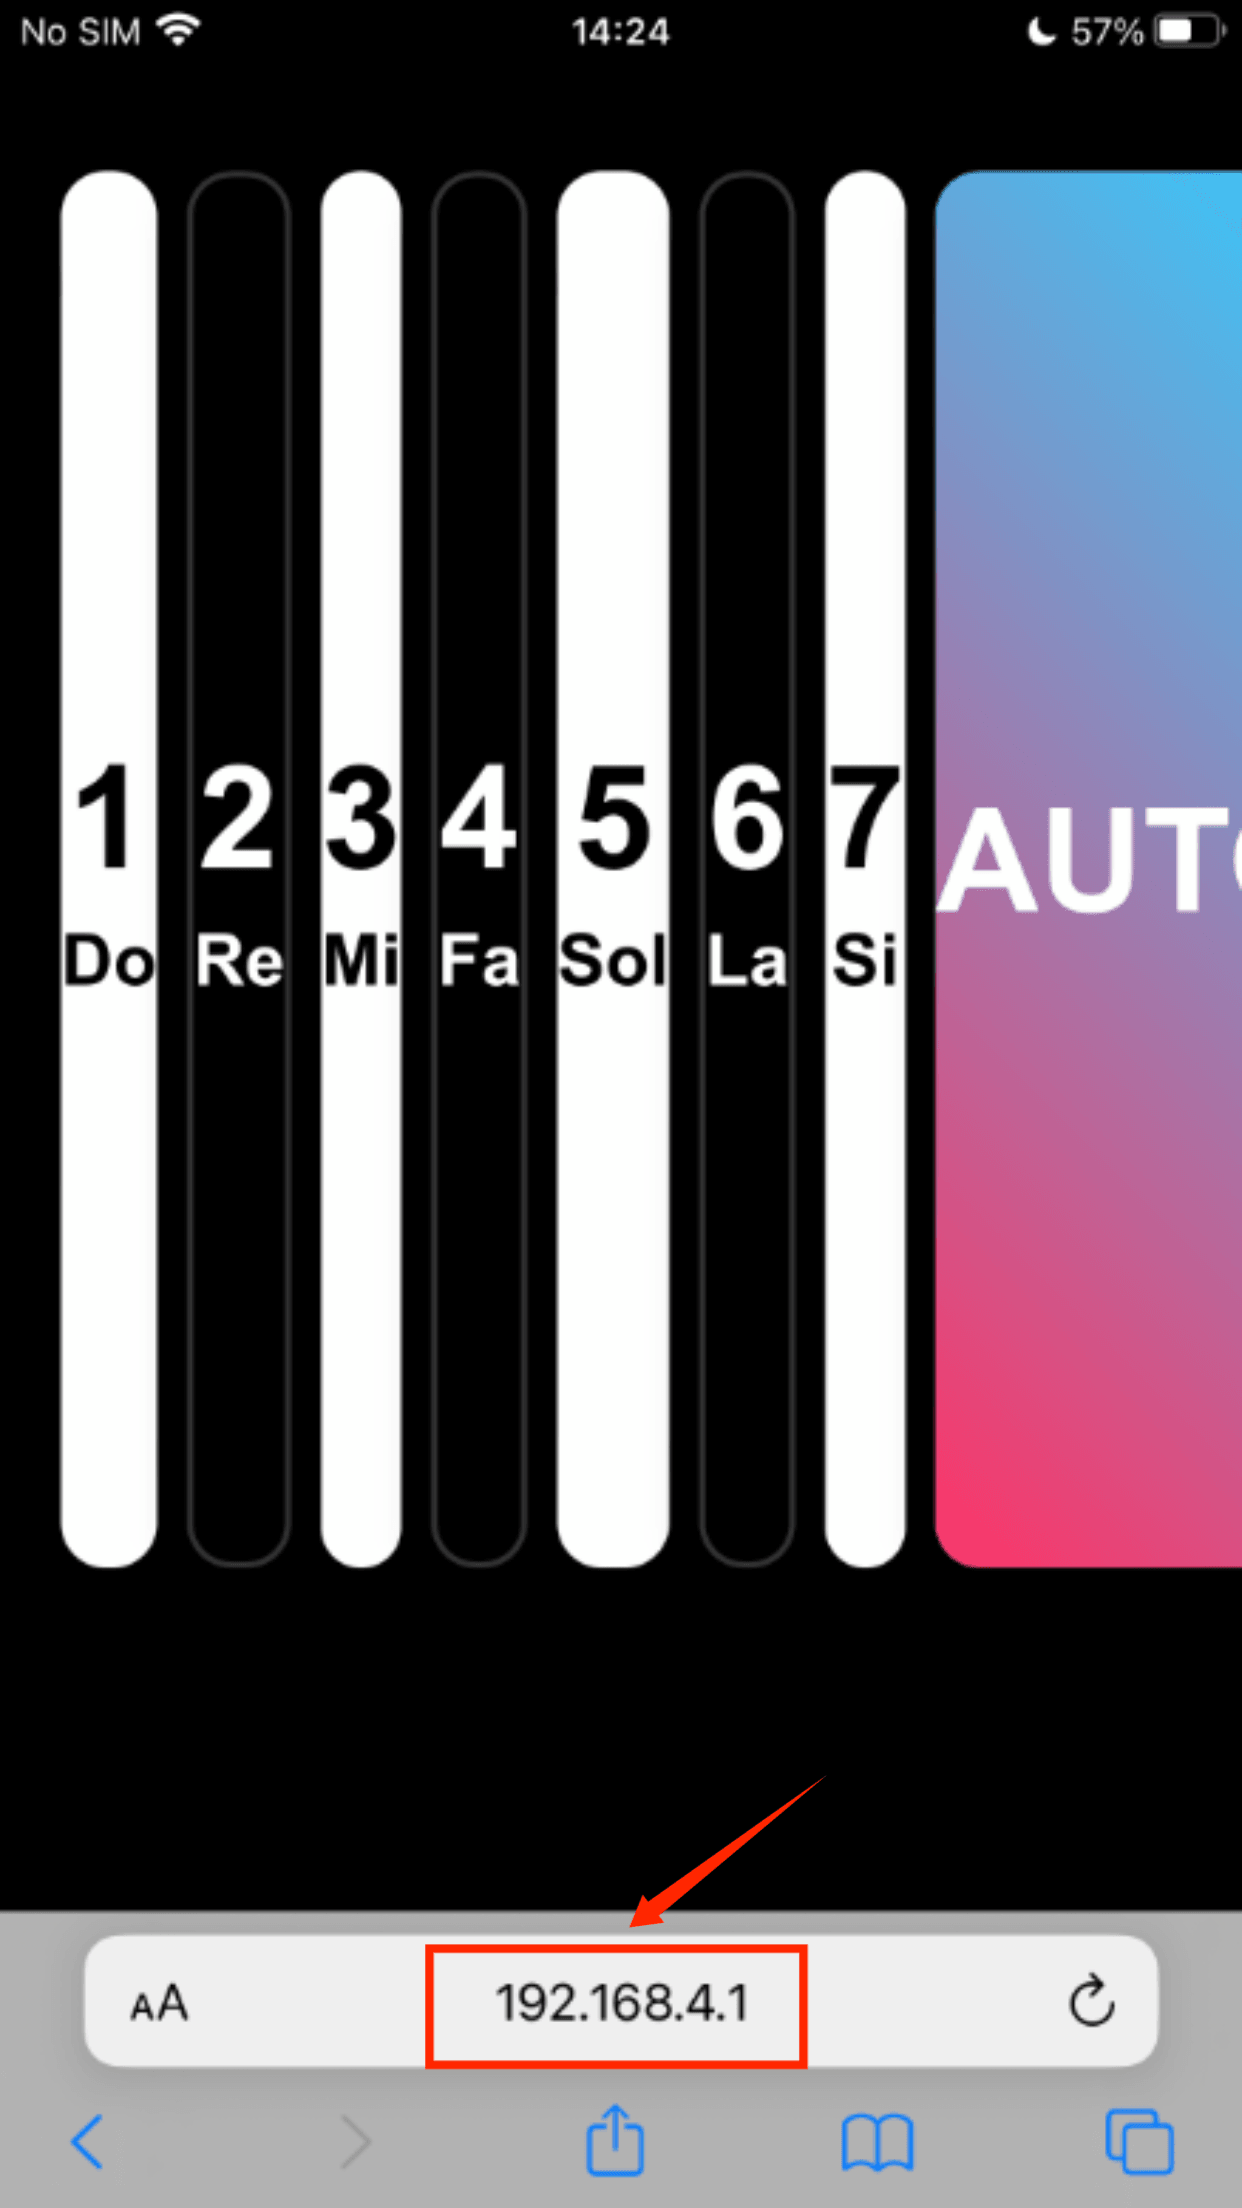
The operation logic of the web control interface is exactly the same as that of the physical buttons. It is recommended to rotate your phone to landscape mode for the best display and operating experience.
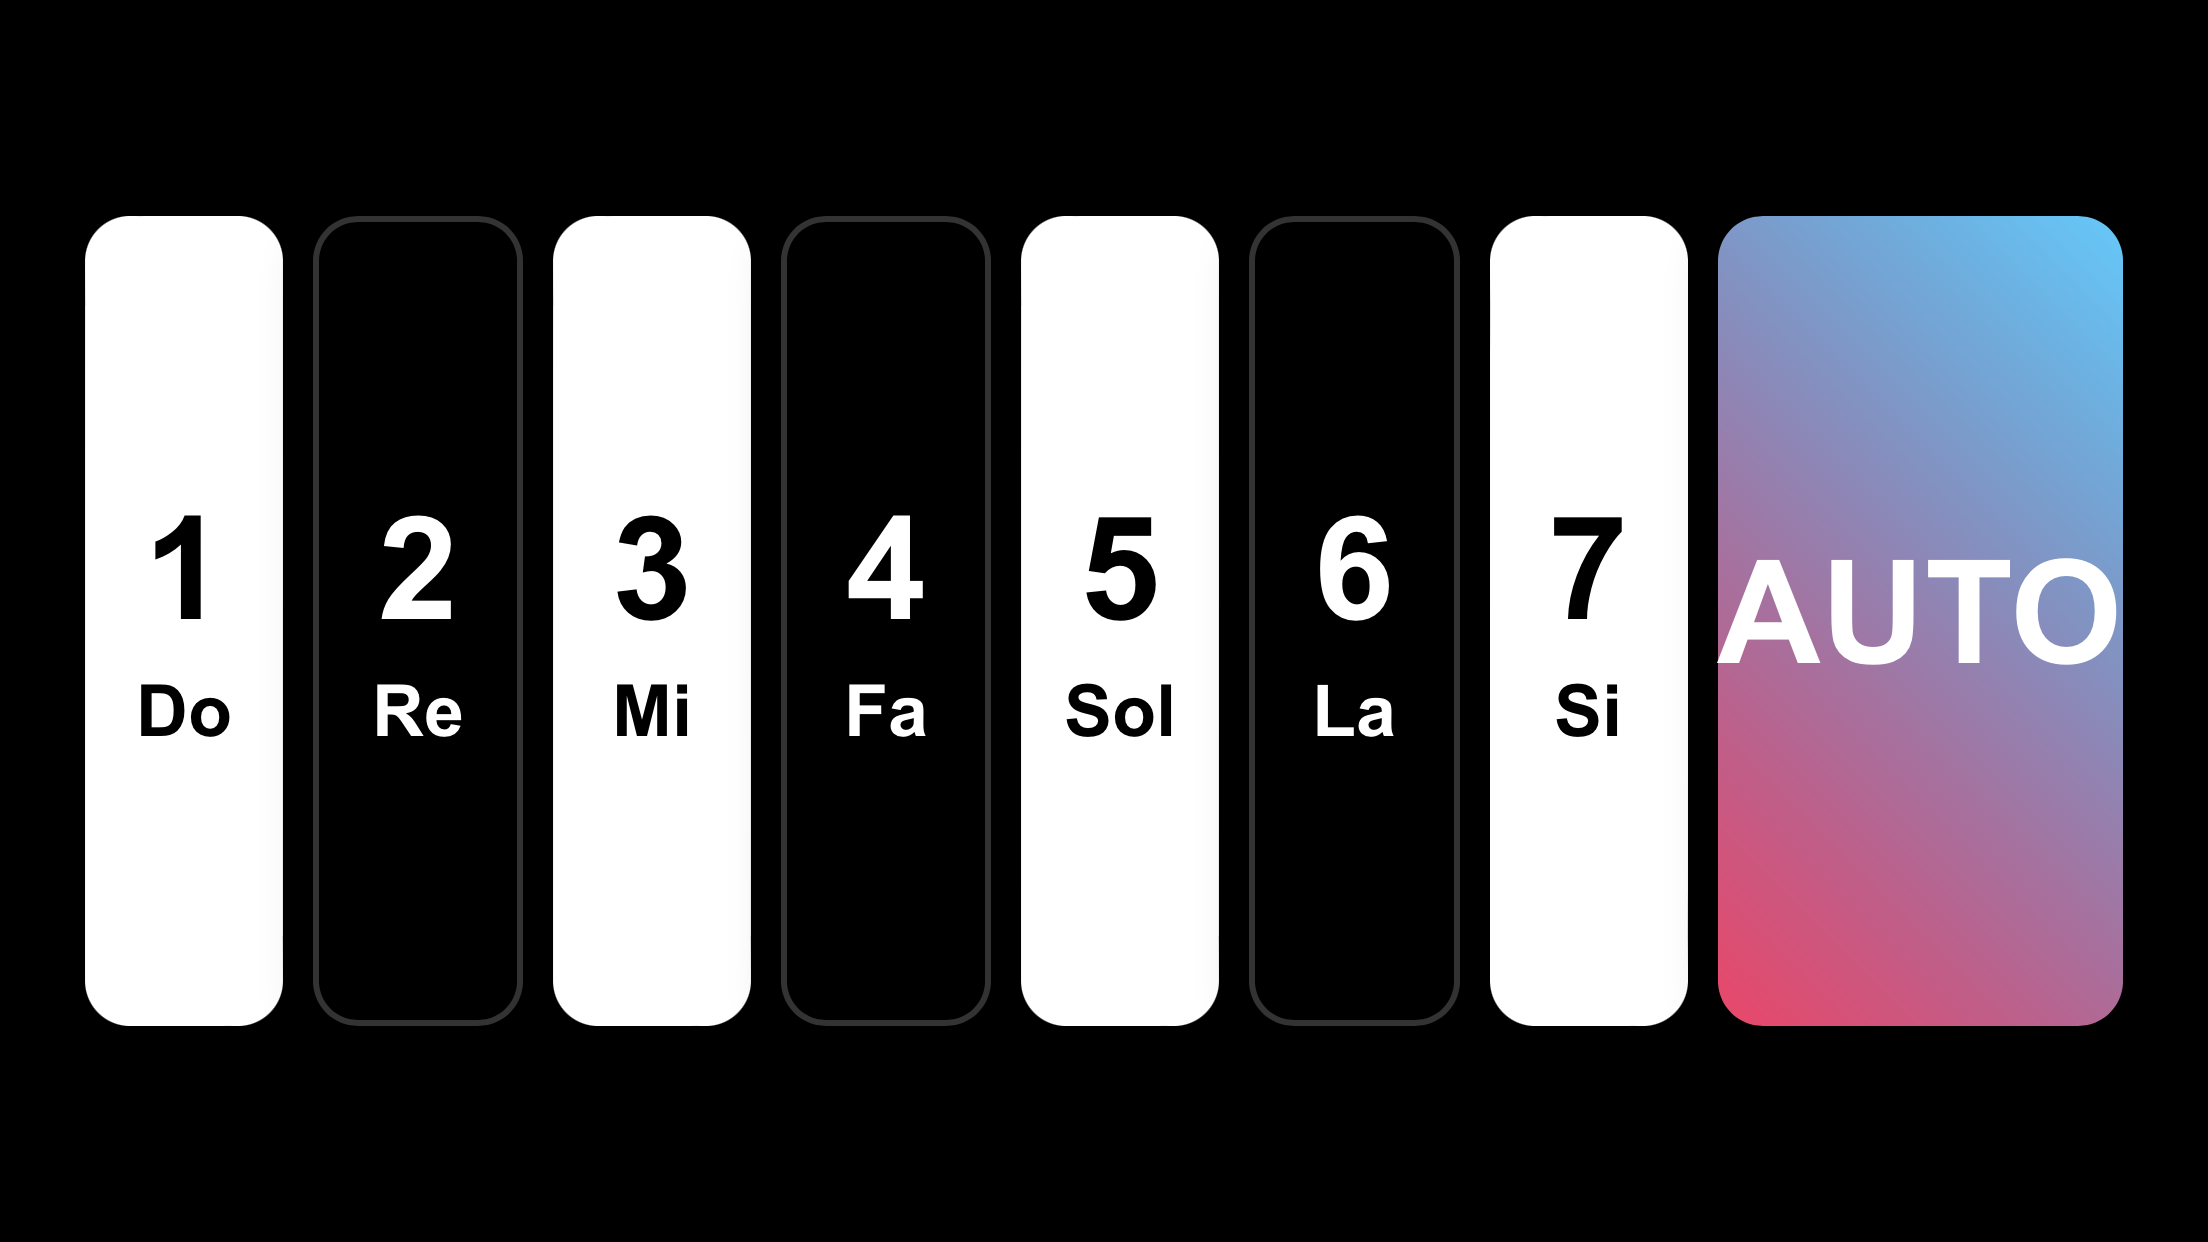
Everything is ready, so play your own music!